.jpg)

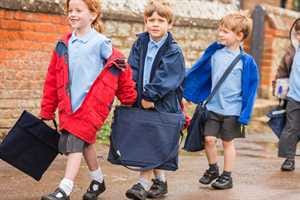
Lesson Ideas and Activities
World Book Day Costume Ideas For You And Your Children
With World Book Day fast approaching many parents nationwide will be thinking the same thing …
“What can my little one dress up as this year (that’s easy and cheap to create)?!”
So, we’ve come up with a few quick and simple DIY World Book Day Costume Ideas for your little ones that can be made at home or in school as part of their everyday learning!
.jpg)
The Three Little Pigs
Pig Masks and Tails
A classic fairy tale that is told throughout the country and is recognised by everyone is The Three Little Pigs. Children can easily get involved in making their own Pig and Wolf Masks at school. Alternatively, adults can rustle up a cheap and quick mask for their little ones at home!
All you need is:
- A pencil
- A paper plate
- A paper cup
- Pink card
- Pink paint and paint brushes
- A piece of elastic
- Glue
- Scissors
- Black felt tip
- Toilet roll cut into 4 pieces to use as circle stencils
- Blue Tack
- Scissors
- Pipe cleaners / feather cleaning brush
- Safety pins
*Note that if the child prefers to be a Wolf, then grey card and paint will be used instead. But all the steps are the same.
.jpg)
Making a Pig Mask:
- Take one of the pieces of toilet roll and use it as a circle stencil to draw 2 circles at the top of the paper plate. These will be the Pig's eyes.
- Place the Blue Tack underneath the circles and one at a time pierce a hole using the pencil in the centre of each circle. Take your scissors and carefully cut out the circles, making the Pig’s eyes.
- Next paint the paper plate and cup pink and leave them to dry.
- Once dry glue the cup onto the paper plate just under the eyes. This will be the Pig’s nose.
- Once secure use the black felt tip pen and draw two black circles onto the nose for the Pig’s nostrils.
- Using the black felt tip pen draw a smiley, astonished, sad mouth on the Pig (whatever expression the child wants to have.) If a Wolf is being made, then you or the child can draw sharp teeth on the mask.
- Next draw two big triangles onto the pink card and cut them out (again if you’re making a Wolf use grey card), these will be the Pig’s ears.
- Place glue on one side of the triangle and stick it on the back of the paper plate, just above each eye. Your Pig mask is now made!
- Using the Blue Tack and Pencil create a hold on the outer edges of the plate on either side of the eyes so that the elastic can be threaded through.
- Knot each end of the elastic so that it doesn’t fall out.
- Your Pig / Wolf mask is now complete.
- To finish the look off, the children can wear a pink or grey onesie.
- A curly pigtail can be made using a pink pipe cleaner (which can be wound around a finger) and can be pinned onto the onesie for extra effect. Or a feather duster can be used for the Wolf’s tail.
Mr Men and Little Miss by Roger Hargreaves
Mr Men or Little Miss Costumes E.g. Little Miss Sunshine
Another classic theme that all children know and love are the Mr. Men and Little Miss books. A wonderful creative lesson can be had with lots of different characters to choose from! All the children need to do is choose their favourite Mr. Men or Little Miss Character. This is an easy and fun costume to make either as an adult or for children to do in the classroom. Make sure the children have their favourite Mr. Men or Little Miss book in front of them so that they can refer to it during the design stages.
All You Need Is:
- Little Miss Sunshine book for example
- A4 sheet of paper
- A large sheet of yellow card
- A sheet of red card
- Pencil
- Black felt tip pen
- Scissors
- Glue
- Yellow ribbon x 2
- Sticky tape
*Note: If you are making Mr. Bump, Mr. Strong or Little Miss Dotty buy the correct coloured card needed for the character.
.jpg)
Making Little Miss Sunshine:
- Using the illustration of Little Miss Sunshine practice drawing Little Miss Sunshine (or any Mr/Little Miss character) on a piece of paper. Ask the children if their character is a circle, square, triangle, oblong etc shape so that they practice drawing these shapes.
- Once practiced take the large sheet of yellow card and start with drawing a big circle on ¾ of the card leaving the bottom ¼ for you or the children to draw Little Miss Sunshine’s legs and feet.
- Once the outline has been drawn of the Mr/Little Miss look at the illustration on the book's cover and add on their hands, mouth, nose, eyes, hair with the pencil.
- At the bottom of the yellow card draw Little Miss Sunshine’s pigtails by drawing 3 circles on top of each other with hair at the end just like the illustration.
- Cut the pigtails and body out.
- Next get some red card and draw 2 bows on them using a black felt tip pen for the outline. Look at the shape of the bows with the children. What shapes are used? (2 triangles and a circle.)
- Cut the bows out.
- Get the glue and stick the pigtails on either side of Little Miss Sunshine's hair.
- Glue the red bows onto the pigtails. Use the book as a reference.
- Using the black felt tip pen, go over all the outlines of Little Miss Sunshine’s hands, nose, mouth, eyes, hair, legs, and even add some freckles.
- Take the 2 pieces of yellow ribbon and tape them to the underneath of Little Miss Sunshine at both sides of the head. The ribbons can then be tied around the child’s neck.
- To add to the theme the child could wear a yellow onesie or leggings and yellow top to create the full effect!
The Fantastic Mr. Fox by Roald Dahl
Fox Masks (Mr. Fox, Mrs. Fox, The Small Foxes)
Roald Dahl’s beloved Fantastic Mr. Fox is a household favourite throughout the world and one that every child who has read it, falls in love with the Fox family.
Why not create your own Mr, Mrs, or Small Foxes for your children?
.jpg)
All You Need Is:
- A fox mask template
- Orange or red card
- Orange or red tissue paper cut into circles
- Scissors
- Glue
- Black felt tip pen
- Sticky tape
- Masking tape
- String
- Stapler
Making 3-D Fox Masks:
- Find a fox mask template on Google (there are lots!)
- Print it out this is the base for your fox mask!
- Cut out the eyes.
- There are two options going forward:
- Option 1 - just colour or paint them for a quick fix or…
- Option 2 - If you want a more impressive mask then read on!
- Using the template – cut the ears off the mask (you can make some more impressive ones!)
- To make the Fox’s ears take some red card. Fold it in half long ways and draw a long triangle on it so that it touches both ends of the card.
- Cut the triangle out (making 2 ears)
- With each triangle cut a line about 10cm long up the middle of the ear starting from the base so that you can create a fold in the ear. Making a nice ear shape.
- Glue the fold in the ear.
- Glue the ear on the back of the mask on either side. Trim away any excess red card from the eyes so that they stay clear.
- Repeat with the other ear.
- To make the nose. Take another piece of red card and make it into a cone shape. Secure it with some sticky tape.
- Cover the tip of the nose with masking tape, squaring it off.
- Colour the masking tape in using the black felt tip pen.
- Make 4, (10cm) cuts around the base of the cone. And fan out the cuts to form 4 flaps.
- Cut away one of the flaps. Place the nose on the mask so that the 3 flaps are on the mask and nothing hangs below the mask.
- Place glue on the 3 flaps and stick the nose onto the mask. You will see the Fox’s face coming to life!
- Tear some red card into lots of strips. Using the strips work from the edge of the nose and stick the strips in layers around the eyes working from the outside to create a feathered effect.
- Repeat this around the second eye.
- Take a tissue paper circle. Fold it in half then snip around the edge of the semi-circle.
- Using some glue, stick the semi-circle over the top of the eye making a bushy eyebrow for the fox. To make it even more bushy you could try and pleat the tissue paper as you stick it down! Repeat on the other eye.
- Take another piece of red tissue paper. Fold it in half and snip it again around the semi-circle. Open it up to see a bushy circle. This time glue the full circle into the centre of the fox’s ear. Repeat on the other ear.
- Turn the mask over. Take the string and position each piece on opposite sides and secure with staples.
- Your fox mask is now made.
- The children can then dress up in a suit, dress or as the small foxes to complete the costume!
.jpg)
World Book Day Costumes For Teachers:
Thinking up new ideas for adult World Book Day costumes doesn’t have to be a costly affair! Here are some fun and easy World Book Day costumes that you can make at home or with the children at school.
The Hungry Caterpillar by Eric Carle
Caterpillar Costume
Another well-loved book that children of all ages know, not only for its lovely story but for its vibrant illustrations!
All You Need Is:
- 1 rectangular piece of red card that can wrap around the circumference of your head
- 2 pieces of yellow card
- 1 piece of purple card
- 4 big pieces of dark green card
- 2 big pieces of light green card
- 1 big piece of black card
- 2 pieces of green ribbon / string (doesn’t have to be green)
- Plate
- Mug
- Yogurt Pot
- Stapler
- Glue
- Scissors
.jpg)
Making The Caterpillar:
- Use the plate as a circle template and draw a circle on each piece of dark green card.
- Cut out the 3 circles.
- Use the plate and draw a circle on each of the light green pieces of card.
- Cut out the 2 circles.
- To make the caterpillar's body take a dark green circle and use this as the starting point. Place glue on the top lip of the light green circle and stick it to the bottom of the dark green circle. Repeat this with all the circles so they go dark, light, dark, light, dark. This will form the body of the caterpillar.
- Take the pieces of ribbon/string and staple them on either side of the top circle to enable you to tie the body around your neck.
- For the caterpillar's legs cut out 10 black rectangles all the same size and glue them on either side of each of the circles. So, there are 5 on each side.
- For the caterpillar's head, take the red card and wrap it around your head. Keeping the shape, staple the two ends of the card together to form a headband.
- Take the mug as a circle template and the piece of yellow card and draw 2 circles. These are going to be part of the eyes. Glue the circles onto the red headband at the front.
- Take the yogurt pot for a circle template and the piece of dark green card (leftover pieces) and draw 2 circles. Glue these smaller circles and stick them on top of the yellow circles. The eyes are complete!
- For the antennae take the purple card and draw 2 large oblongs. Cut them out and using the glue, stick them onto the inside of the headband above each eye. Your caterpillar’s head is now complete.
- Finish the look off by wearing a green onesie or top and bottoms!
Product Spotlight
Alice in Wonderland by Lewis Carroll
The Queen or King of Hearts Costume:
An all-time classic book loved by all generations and one that promotes a wonderful imagination is Lewis Carroll’s Alice in Wonderland.
This 10-minute adult World Book Day costume can be made for the Queen or King of Hearts – you just need to adapt it to suit the character.
.jpg)
All You Need Is:
- A pack of cards
- 2 pieces of string or ribbon
- 2 pieces of red card
- Glue
- Staples
- Black dress or black top and trousers
- Scissors
- Crown/Tiara
Making The Costume:
- Take around half the pack of cards and fan them out so that they overlap into a collar shape that will fit around your neck.
- Stick the cards together with the glue (keeping the fanned-out effect).
- Once dry attach with staples, a piece of string/ribbon to either end so that you can tie the collar around your neck.
- Take the red card and draw a big heart shape. Cut it out.
- Staple it onto the middle of your black dress/top.
- With the rest of the red card draw a smaller heart and either a Q or K then cut these out.
- Using the stapler, staple the Q or K onto your black dress/top on the top left-hand side like a playing card with the small heart below it.
- For a more regal effect wear a crown (bought or homemade) or tiara.
- Your Queen or Kings of Hearts costume is made!